Cast on part 2
Step Two
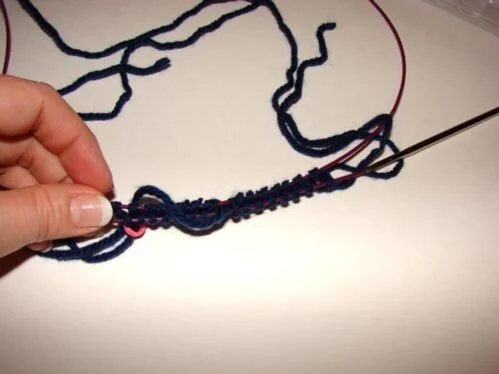
Ok, first, let me tell you that this first round is super finicky and a pain in the you know what. But take it slow and be patient with yourself. Hang in there, it gets easier after the first round.
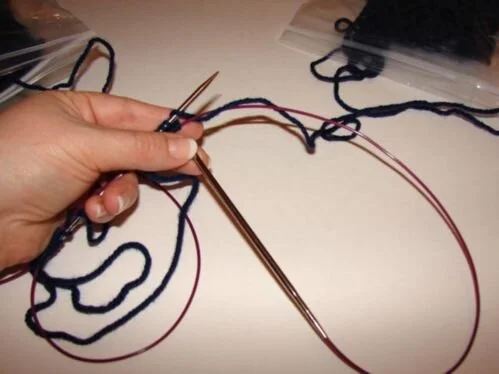
Slide the bottom needle tip so that you have enough slack to hold the needles comfortably, but not so much that you pull out the loop of cable at the other end.
If you didn't go watch Amy's video at KnittingHelp.com, go now. You'll understand how to adjust your needles so much more.
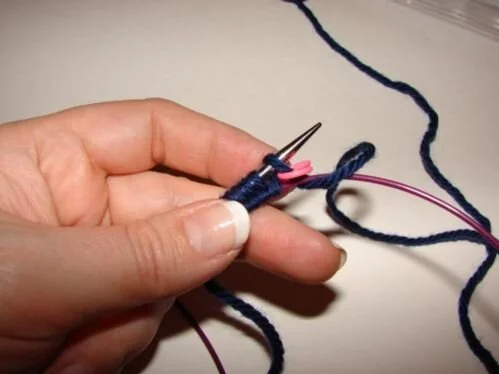
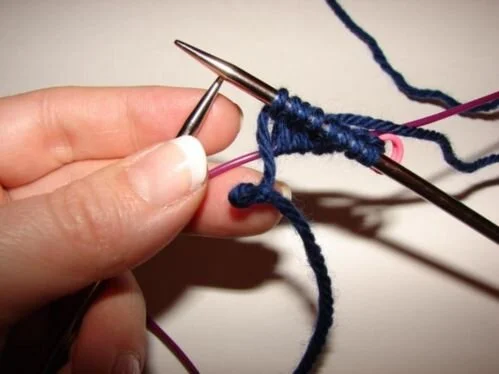
Slip your removable stitch marker around one side of the very first stitch on the needle. You can also use a safety pin, or tie a little scrap of yarn. Use something in a contrasting color so it can be found at a glance.
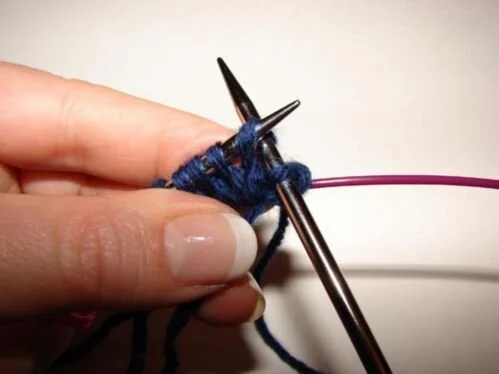
Now begin knitting the 8 stitches on the needle. Please note that the working yarn will come from under and then over the cable. That last loop around the cable on the bottom IS a stitch, so don't lose it!
It may seem a little weird knitting these "stitches" because the other side of them is on the cable. Just keep knitting them, and forget about the cable side for now.
Knit until you come to the slip knot. Slide the slip knot off, and pull the knot out. You're done with it.
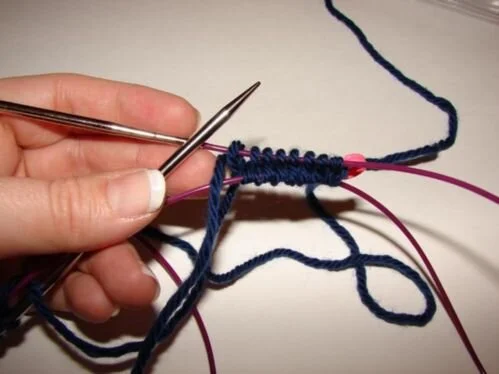
Now, you've knit the 8 stitches on the needle for one group (this will become Sock A). Slide that group down off the right needle just a bit, and slide the next group (will become Sock B) onto the left needle.
Switch to the other working yarn, you have two, one for each sock. Knit the 8 stitches on the needle, and drop and pull out the slip knot just as you did before.
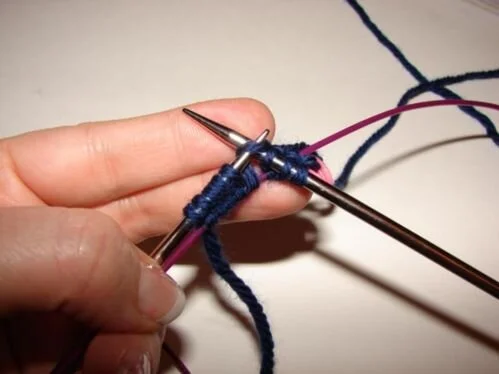
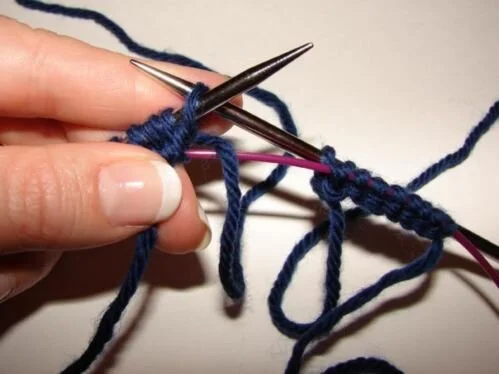
You'll have knit one side on both sets of stitches (or to-be socks)! Now, to knit the other side, hold the needles and flip the entire thing over so that the cable is on top and the needle is on the bottom. (Good thing you watched Amy's video, right?)
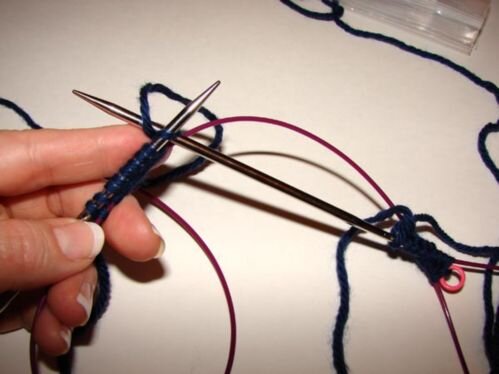
Carefully slide the bottom needle out to the right so that those stitches you just worked are resting on the cable.
Carefully slide the cable on the top to the left so the unworked stitches are on the needle and ready to to be knit. Note: When you are sliding the cable/needles here and there, go SLOWLY! You do not want to pull it out so fast or so far that your stitches fall off a needle!
Count the top stitches to make sure there are still 8. The working yarn should be coming from between the needle and cable, then around and under the cable. This last wrap around the cable IS a stitch on the bottom, don't lose that one!
Now slide the bottom needle to a comfortable position and prepare to knit the stitches on the top needle.
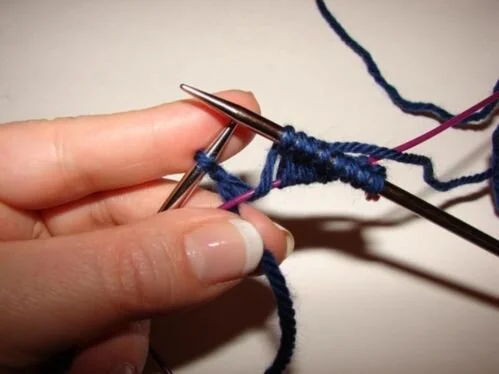
NOTE: These stitches are twisted. If you'll look carefully, you'll see that each loop is backwards from a regular stitch. (Normal stitches go from the front, over the needle to the back in a right to left motion. These are going from left to right.) This is due to wrapping the cast on stitches. These stitches need to be knit through the back loop which will straighten them out.
Insert your needle from right to left into the back side of the loop, and knit the stitch like normal.
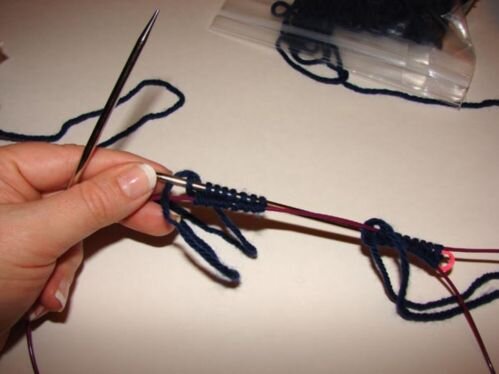
Continue knitting all 8 stitches on this needle in this fashion, through the back loop. Drop the working yarn for this section.
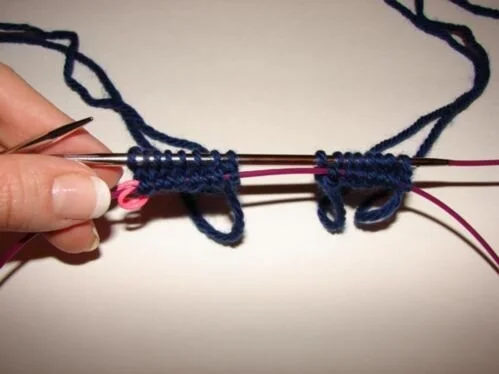
Slide these finished 8 stitches to the right just a bit. Slide the unworked stitches onto the left needle and knit these 8 stitches through the back loop with the second ball of yarn.
All stitches have been worked, and you've officially finished this figure 8 cast on and first round. You can take a deep breath, it gets easier now. Upon closer inspection, you'll see that there are 3 rows of knitting for each toe. One cast on row and a row that you've knit on either side of it, but they look like one continuous little tiny strip of knitting.
If any of the center row stitches are loose or wonky, don't worry about them right now. You can fix it later by tightening each stitch along that row until you reach the tail. If you've cast on and knit these stitches carefully, you might not have any loose stitches. This is why I insisted that you wrap around a needle and a cable instead of both needle tips.
When you wrapped the stitches to cast on, those two wraps (one on the needle and one on the cable) create ONE stitch. If you had wrapped around both needle tips, these stitches would be twice the size of the surrounding stitches because it would be as if you knit them onto 2 needles instead of one. Wrapping on one needle and one cable minimizes the extra slack you allow for each stitch (one of the reasons a thin cable is important), and pulling them snug as you wrap minimizes it even more. The end result is a near perfect cast on row that is the same size as all other rows.
