Two toe-up socks on One Circular Needle
Read this first!
This tutorial is for the knitter who has successfully knit at least one pair of socks before, and has a fair bit of prior knitting experience. If you've never knit a sock before, I highly recommend that you go back and choose an easier tutorial. Knitting two socks at one time can quickly become messy if you're not calm and patient and have a bit of understanding with the yarn. You will be working with two balls of yarn at one time, and they will tangle around each other if you do not stay on top of it. If you are prone to giving up in a fit of frustration, perhaps you should consider knitting socks one at a time. If you're still here.... proceed at your own risk, and good luck!
Because this tutorial is somewhat challenging, I will be working with only one type of yarn, worsted weight. After you successfully knit a pair of socks in worsted weight, you will be able to apply this 2-socks-at-once technique to almost any toe-up sock pattern.
Please take a few minutes to visit KnittingHelp.com and watch Amy's video on knitting on a magic loop, it is invaluable in helping you understand how to maneuver your needles during this tutorial.
Supplies Needed
Worsted weight yarn - approx 225 - 350 yards in 2 separate balls
Amount of yarn needed depends on how long you want the leg portion.
For this tutorial, I knit pair of over-the-calf socks for my husband's size 10.5 feet with 330 yards (3 balls of Knit Picks' Swish Superwash in Navy)
A Size 5 or 6 circular needle, at least 40 inches long
The longer the needle, the better. Also, a thin, supple cable is very important. I recommend Hiya Hiya, Knit Picks Options or Addi Turbos. Using a different brand of needle may result in more challenges!! I used Knit Picks Options size 5 needles on the 47" cable.
You will also need
one removable stitch marker
a tapestry or yarn needle
a ruler or measuring tape
and a lot of patience
Step one - cast on
Tie a slip knot in the end of each ball of yarn. This slip knot is only to anchor the yarn while you cast on and will not count as a stitch.
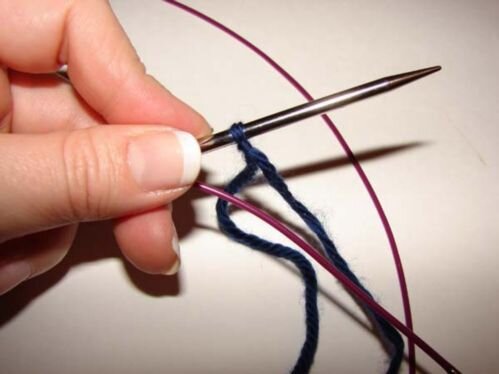
Slide one slip knot on to one tip of your needle. Fold the needle in half and hold your needle so that both tips are parallel, then slide the bottom needle tip (the one without the slip knot) so that you are holding one tip and one cable as shown. (Be extremely careful that you are holding the yarn and needle exactly as pictured.)
Begin a figure 8 cast on:
Bring the working yarn (not the tail of the slip knot) under then over the cable as shown:
Next, bring the yarn under and over the top of the needle:
Pull the yarn snug. Repeat these wraps until you have 8 wraps on the needle and 8 on the cable. Do not count the slip knot. There will be a total of 16 stitches, plus the slip knot.
When wrapping, remember to go down between the needle and cable, and then up and over the needle and/or cable. Remember this is a "figure 8" cast on, because the yarn is wrapped in a figure 8 pattern. Also, when pulling the yarn snug, pull it so that it is snug around the needle and cable, and pulls the two close together.
Note: You may be tempted to slide the other needle tip and wrap around it instead of the cable, but don’t. Wrapping the cable will result in a much more even cast on that will become evident a little later in the tutorial. Just trust me, ok?
Count your wraps to double check you have wrapped enough times, then double check again. Leave the working yarn going down and between the needle and the cable.
While holding the stitches, slide the top needle out so that your wraps are all on both sides of the cable. Slide the needle out just enough to put the stitches on the cable. Do not pull the cable loop all the way out!
Now using the SECOND ball of yarn, slide the slip knot onto the top needle, and repeat these steps to wrap 16 more stitches (8 on the needle, 8 on the cable). Both groups of stitches will come from a separate ball of yarn.


