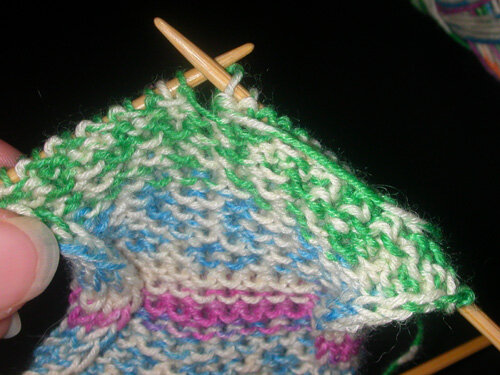
The heel, part two
Step six - turning the heel
PLEASE PAY ATTENTION CAREFULLY TO ALL INSTRUCTION AND PHOTOS!!!
There is a lot of instruction here, try not to be intimidated. Take one step at a time. It's worth it! This is where the magic starts...
So now you have your finished heel flap. You should have last knitted a right side row (slip 1 knit 1 row), and you're ready to purl the next.
Row 1:
With your empty working needle, purl to 2 stitches beyond center. (purl 18 14 12 stitches.)
Next, purl 2 stitches together as one (see pic and instructions below).
Purl one more stitch and turn your work.. (yes, even though you havent purled all the stitches on your needle.)
Purled 18 stitches
Purling 2 together as one (insert your working needle into TWO stitches and purl them together as one.)
Row 2:
Slip the first stitch (from the stitches you just purled, not the stitches left on the right needle).
Knit 5 stitches.
Knit the next 2 together. (See pic and instructions below.)
Knit one more stitch.
Turn your work.
Knitting 2 together. Insert the working needle into the next two stitches and knit them together as one.
Row 3:
Slip one stitch.
Purl to within one stitch of last turn (see photo and instructions below).
Purl two together.
Purl one more.
Turn your work.
Purling two together.
Within one stitch of last turn is easy to see because there will be a very obvious gap. Purl the two stitches on either side of the gap together as one. Then purl one more and turn your work.
Row 4:
Slip one stitch.
Knit to within one stitch of last turn (see photo and instructions below).
Knit two together.
Knit one more.
Turn your work.
Knitting two together.
At the gap, knit the two stitches together on either side of the gap. Then knit one more and turn your work.
Repeat rows 3 & 4 until all stitches are worked, ending with a knit row. Each time you work a row, you are working more stitches than the row before. Continue until all stitches are worked, when the last two stitches (on both sides) are knit or purled together.
Once finished, you will have 18 14 12 stitches left on needle #1.
And you have worked the magic that turned your flat heel flap into a turned heel!


